Hogwarts Legacy: A Guide to Nicknaming Your Rescued Beasts
Hogwarts Legacy continues to delight players with its depth and hidden features. For those seeking enhanced immersion, the ability to rename rescued beasts adds a personal touch often overlooked. This guide provides a step-by-step walkthrough on how to nickname your magical creatures.
Steps to Nicknaming Beasts
-
Access the Vivarium: Navigate to the Room of Requirement in Hogwarts Castle and enter your Vivarium.
-
Summon the Beast: Ensure the beast you wish to rename is present. If it's in your inventory, summon it using the Beast Inventory menu.
-
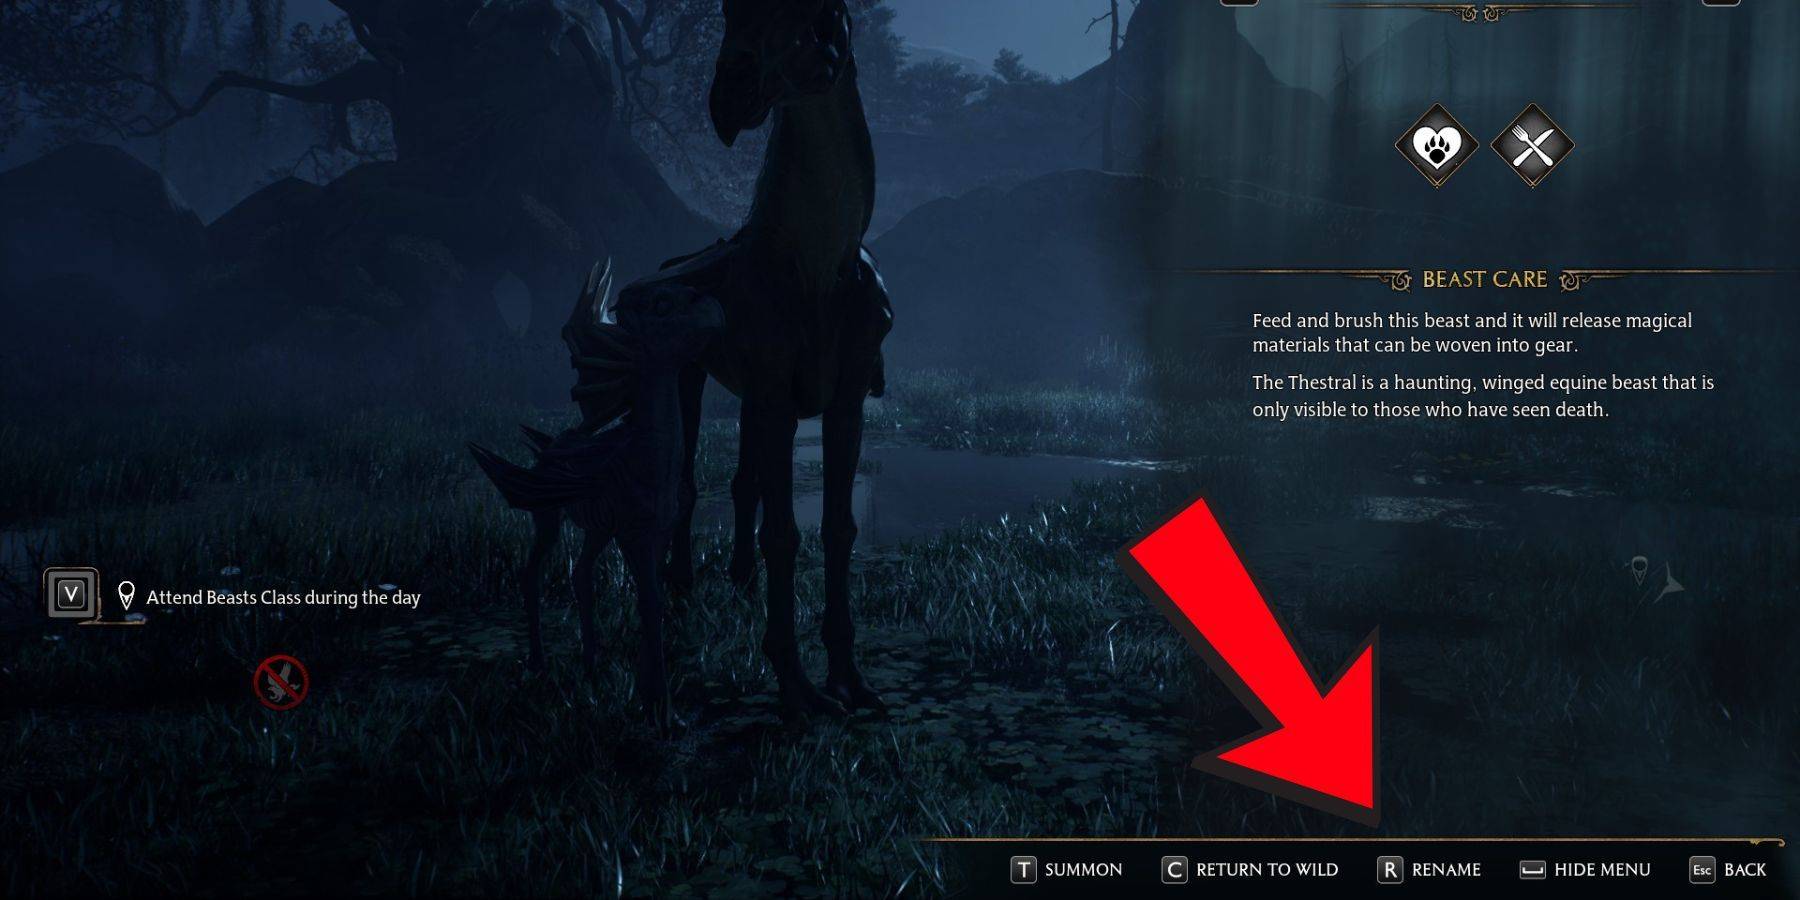
Interact with the Beast: Approach the beast and interact with it. This will display its current status and wellbeing.
-
Select "Rename": Within the interaction menu, locate and select the "Rename" option.
-
Enter and Confirm Nickname: Type your chosen nickname and confirm your selection.
-
View Nickname: Approach the beast again and interact; its new nickname will be displayed.

Benefits of Renaming Beasts
Renaming your beasts offers significant advantages, particularly when managing a large collection, especially rarer creatures. The ability to rename repeatedly allows for personalized organization and a stronger sense of connection with your magical companions. This often-missed feature provides another layer of customization, enhancing the overall player experience.
 Latest Downloads
 Downlaod


 Top News


![Cockham Superheroes – New Version 0.5.2 [EpicLust]](https://images.5534.cc/uploads/36/1719595948667ef3acb2d9e.jpg)